Installation Instructions
Option 1: XMLA Script (Recommended)
Download the proper .xmla file from the latest release (for example ASSP_2017_v1_4_3.xmla is for SQL Server 2017 and is ASSP release 1.4.3), open in SQL Server Management Studio and execute the script against your Analysis Services Multidimensional server. If you need to adjust the properties of the assembly then open the Assemblies folder and edit the properties of the ASSP assembly.
Option 2: Deploying DLL
Download the proper .zip file from the latest release of ASSP and unzip the DLL.
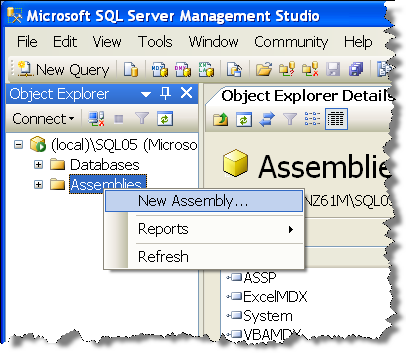
Start by opening SQL Server Management Studio (SSMS)
- If you want the Assembly available to all databases, right clicking on the Assemblies node under the Server.
- If you only want the Assembly available to a single database, right click on the Assemblies node under that database.
Then choose the “new Assembly…” option
When the register assembly dialog box comes up, use the browse button to locate the ASSP.DLL file.
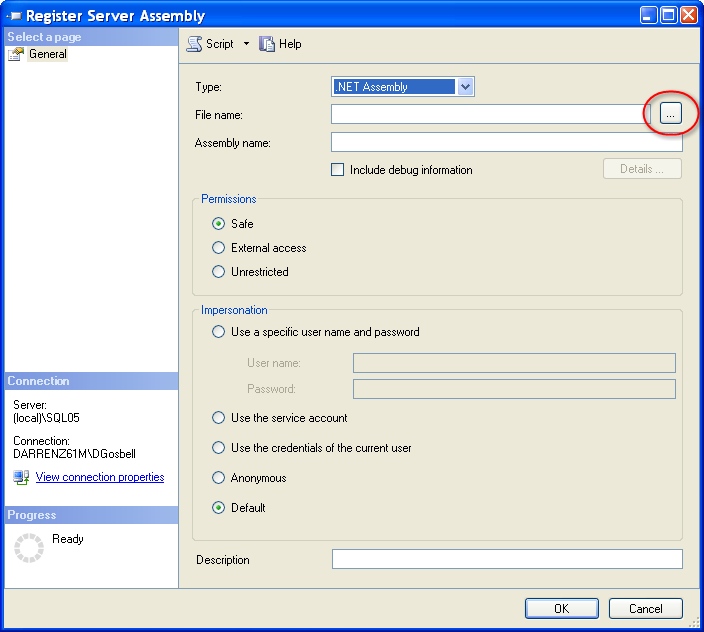
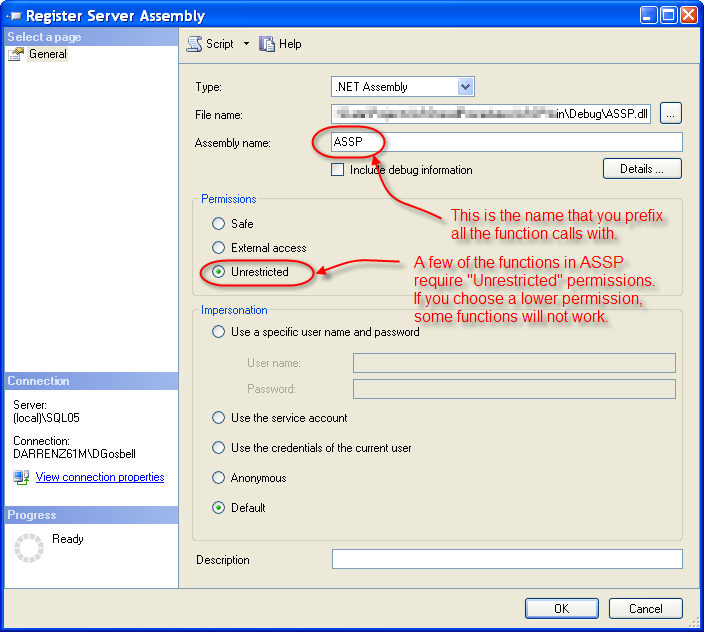
The other important choices to make are what name to give to the assembly reference and what security permissions to allocate. Keeping the default name of “ASSP” will mean that all of the example scripts should work without modification. Note that there are some functions that will only work if the assembly is registered with unrestricted permissions.
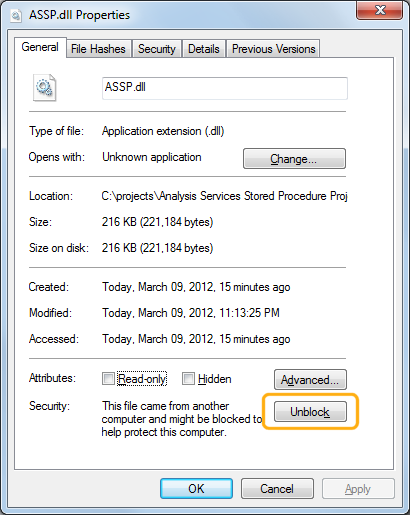
For ASSP 2012 and ASSP 2014, you must unblock the DLLs before registering them because .NET 4.0 added this restriction. If you don’t unblock the DLL, then you will get the “Clr Assembly must have main file specified.” error. Right click on the file and choose Properties and unblock:
Also, make sure you are using the SQL Server Management Studio version which corresponds to your Analysis Services version. For example, if you’re using Analysis Services 2012, make sure to use SSMS 2012 to create the assembly. If you use SSMS2008 to create an assembly on a AS2012 server, you may receive the “Clr Assembly must have main file specified.” error.